Summertime Waves

7.05.2015

This post contains affiliate links. Scroll down for coupon codes, updated 5/30/16


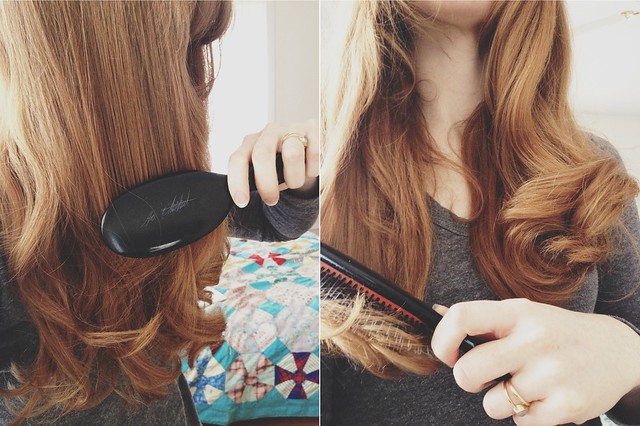
Summer is in full swing here and it's HOT! I keep thinking of wavy summery beach hair, not that we have beaches where I live. But no matter where you are, in the summer heat, easy casual hairstyles are usually your best bet! I thought it would be fun to throw together a quick wavy hair tutorial for you. It's so so easy and all you need is a curling wand. Also don't forget to heat treat your hair before using the curling wand. I really like using argan oil in my hair, especially in the summertime.

**Scroll down to see video**


Tools you will need:

Step 1:
Like I mentioned above, apply heat protectant before you begin curling your hair. These curling wands get HOT!

Step 2:
No need to clip sections of your hair back, just take random pieces of hair, about 1/2"-1" wide, and wrap it around the curling wand so the hair twists as you wrap. Don't wrap the ends around the wand, but leave a couple of inches hanging off.

Step 3:
This step is hard to explain, but you will clearly see what I mean in the video. But basically you want to move the curling wand up and down while your hair heats up. This step is optional, but I like how natural it makes the curls look. Either way, test to see how long you want to wait for each curl. It depends on how thick your hair is and how much hair you pick up. I waited around 15 seconds or so for mine.

Step 4:
Each time you take a curl off the wand, use your fingers to separate the curls, essentially "teasing" the hair as you go. You can see in the video how I'm doing this!

Step 5:
Finish curling the rest of your hair. This time I curled my hair away from my face, but you can play around with what looks best and how you want to do it. I didn't use any hairspray for this look, because I wanted it to be easy and natural looking. Curls like these usually last me a few days. I also want to point out that freshly washed hair will make your curls last longer!

I hope you will try this hairstyle on your hair and let me know how you like it!


P.S. I'm kind of obsessed with this nude lipstick I picked up the other day (wearing in the photo). I want to try them all!


If you are thinking of getting a NuMe wand, take advantage of these coupon codes! Using a coupon, these wands are just as much (and many times cheaper) as a drugstore curling wand and in my experience, so much better! I keep the coupon codes updated, so check back if you want a great deal!


(New discounts! Updated 5/30/16)

ANY wand $28! Use code: PICKONE (expires 5/31)

Buy any wand 50% off, get a FREE Style Setter Straightener and Free Shipping! Use code GETYOURS

Any set $88! Use code ANYSET88 (expires 5/31)

Silhouette Straightener + Argan oil $39. Use code QUICK39


(The codes below may or may not work. Some have expired.)

$110 OFF any set! Use code LOVETHIS

70% off all wands + Free US/Canada Shipping. Use code CURLS70

60% OFF all wands + Free US Shipping. Use code CURLS50

50% off Sitewide (excludes collections, haircare, access) + Free US Shipping! Use code SAVEBIG

Curl Jam + Dryer + WT Shampoo & Conditioner $179. Use code ITSALLGOOD

Megastar + Argan + FREE US Shipping $79. Use code MEGAGOOD

Power Couple Set + Free US Shipping $79. Use code POWERSET

Buy 2 CLASSIC WANDS + Free US Shipping $58. Use code 2FORME

Titan 3 + Free US Shipping $89. Use code 3WAYCURLS

Bold Dryer + Free US Shipping $59. Use code BOLD59

All Sets (including Octowands!) + Free US Shipping $99. Use code 99SETS

White Truffle Collection $49. Use code HAIRCARE


This post contains affiliate links, which means I receive 10% if you make a purchase using this link. However, the item featured in this post was purchased by me and I was not paid to write this review/tutorial. All opinions are my own.  

How to curl your hair in less than 20 minutes

5.05.2014


This post contains affiliate links. Scroll down for coupon codes, updated 5/30/16

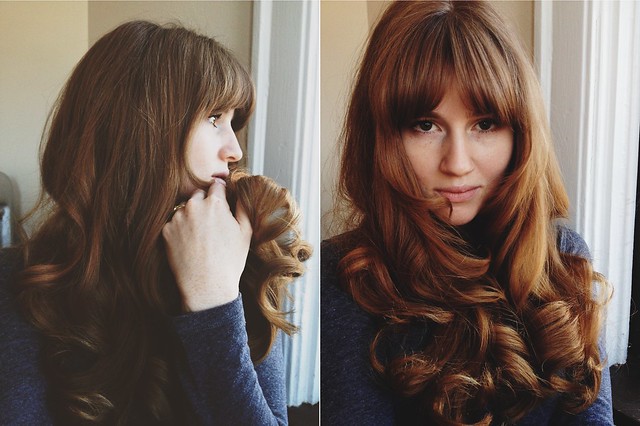
I thought I would share with you a quick hairstyle I like to do often because it's SO easy and lasts several days. Recently I purchased the NuMe curling wand (I used a coupon which made it very affordable) because I had been reading a lot about how good it was and I was looking for an easier way to curl my hair that would last longer than a day. I love my vintage hot rollers set, but they take a bit more time and they're not always convenient for travel. 

I decided on the 19mm curling wand and I really like this size. I watched a few reviews of the NuMe curling wands and a lot of people were using the 25mm or 32mm, but I wanted a little more curl so I decided to try a size smaller. However, I would really love to try out the larger curling wands and see if I can get a 1970's wave. If I am able to acquire one of those I'll update with another tutorial! 
If you have never used a curling wand before, make sure you use the heat protecting glove (the NuMe wand came with a glove, but I don't really use it anymore). Also definitely put something on your hair to protect it from the heat. I have been using this heat protection spray by Tresemme.

Step 1:  Curl front hair/bangs away from your face. Continue curling the rest of your hair away from your face, grabbing sections and wrapping it around the curling wand until you have curled all of your hair. This does not have to be perfect! The larger the section of hair you grab, the longer you hold it on the curling wand. Every type of hair is different, but mine is pretty thick so I hold the curl anywhere from 20-30 seconds (about 1" or more sections) or more like 10-15 seconds if I grab a smaller (1/2" section). If you have finer hair, hold it on for less time! As you can see in the last picture here, my hair definitely is not perfectly curled! Let the curls cool completely before you move onto the next step.
Step 2: After you have curled the majority of your hair, tip your head back and using your fingers at the roots, "shake" the curls out. At this point, you can add more curls if you think you need more.
Step 3: Take a section at the top of your head, towards the back and tease it with a comb. I like to add a bit of hairspray at this point. I sometimes tease more than one section, depending on how high I want my hair to be.

Step 4: Then curl the teased section of hair, wrapping the hair down around the curling wand. I sometimes add a few more curls around this area. Separate these curls with your fingers.
Step 5: Once I'm all finished curling, I like to add a bit of hairspray (I use Elnett) to add volume so I grab some hair and pull it up while spraying a mist of hairspray underneath the top layer of hair. This adds lots of volume. And you're done! This style takes me less than 20 minutes to complete, and lasts for days! I've found these curls last up to 2-3 days on my hair. I even like how my hair looks on the second day better. If you feel the need to have more curl the second or third day, just heat up the wand and add a few extra curls, which only takes a few minutes. So fast and easy! 
I hope you enjoyed this tutorial and do try it on yourself sometime! Let me know if you have any questions or if you would like other tutorials like this.

xoxo 
Anna

P.S. Here are some coupon codes if you are interested! 


(New discounts! Updated 5/30/16)

ANY wand $28! Use code: PICKONE (expires 5/31)

Buy any wand 50% off, get a FREE Style Setter Straightener and Free Shipping! Use code GETYOURS

Any set $88! Use code ANYSET88 (expires 5/31)

Silhouette Straightener + Argan oil $39. Use code QUICK39


(The codes below may or may not work. Some have expired.)

$110 OFF any set! Use code LOVETHIS

70% off all wands + Free US/Canada Shipping. Use code CURLS70

60% OFF all wands + Free US Shipping. Use code CURLS50

50% off Sitewide (excludes collections, haircare, access) + Free US Shipping! Use code SAVEBIG

Curl Jam + Dryer + WT Shampoo & Conditioner $179. Use code ITSALLGOOD

Megastar + Argan + FREE US Shipping $79. Use code MEGAGOOD

Power Couple Set + Free US Shipping $79. Use code POWERSET

Buy 2 CLASSIC WANDS + Free US Shipping $58. Use code 2FORME

Titan 3 + Free US Shipping $89. Use code 3WAYCURLS

Bold Dryer + Free US Shipping $59. Use code BOLD59

All Sets (including Octowands!) + Free US Shipping $99. Use code 99SETS

White Truffle Collection $49. Use code HAIRCARE


This post contains affiliate links, which means I receive a small percentage of sales if you make a purchase using these links. However, the item featured in this post was purchased by me and I was not paid to write this review/tutorial. All opinions are my own.  

makeup tutorial with cat eyeliner

4.28.2014


I've been having good skin days for the past week (crossing my fingers this lasts) so I thought I would do a makeup tutorial for you all! I tend to do this look quite often, changing up the eyeshadow color and sometimes using other types of eyeliner. This eyeliner is pretty basic and not too dramatic, so it's great for a daytime look. If you're going out, pop on a bit of lipstick and you're all set!


Start off with a clean face, if you usually wear lotion, make sure to allow it to "settle in" before you begin.


Affiliate links included in this post.

I use a matte primer by Boots No7 because my skin tends to get a bit oily after wearing foundation and I think this helps my foundation last a lot longer on my face. I also found I could not live without this primer for when I was having major acne breakouts. It helped keep the foundation in place and also helps to conceal my dry skin (I think I have a combination skin type). It has mixed reviews, so it might not be right for you but I love it!


Today I'm using Revlon Nearly Naked foundation in the color 120 Vanilla. It seems to fit my coloring pretty well and I have a light complexion. I use my fingers to apply it all over my face. I usually start with a tiny amount on my chin and work up, since my chin/neck area is where I have had the majority of my breakouts (although you can't tell in the pictures). I try not to get any near my eyes after a terrible reaction that made my eyes puffy with eczema. I finally figured out the reaction was coming from my foundation and probably because it has spf in it! (I later found out I have a benzoyl peroxide allergy, which caused my eyelids to swell up, even if I used the tiniest amount on my face.) I also use a beauty blender sponge to finish blending in my foundation since it always gets kind of streaky on me when applying with my fingers. I got my sponge at Walgreens. Next use concealer under eyes and on any blemishes.

Using my Lily Lolo mineral foundation in porcelain, I go over my face with a light dusting. This is just what I have so I use it, but you can use any setting powder you have (I have now switched to Rimmel in transparent). Sometimes I skip this step.

I used a taupe colored eyeshadow as a base. I don't have an eyelid primer right now so I didn't use any, but it does make a difference if your eyeshadow tends to crease. Then I used a pretty purple shadow from an e.l.f. eyeshadow book (Warm #85038). I like to build it up starting on the outer edge of my eye. I used the No.07 eyeshadow brush by Sonia Kashuk to apply.

The cat eyeliner takes a bit of practice if you aren't used to applying eyeliner. But it gets easier. I use a lot of different liners, depending on my mood. But this waterproof gel liner by Rimmel is really easy to work with. The color I used is brown 002 and I used an angle brush by EcoTools to apply. The angle brush is just my preference as I've found it's easier for me to make even flicks on each eye. But you can use whichever eyeliner brush you like. I start by making the line on the outer corner of my right eye and then try to copy as closely as possible on my left eye. Then I fill in the rest of the liner along my upper lash line. There are great tutorials on YouTube if you have never applied eyeliner before. Leave a comment if you need recommendations.
After I apply my cat eyeliner, I curl the lashes with my favorite eyelash curler by Shu Uemura (a present from my sister!). I highly recommend you don't skip this step. It makes ALL the difference, believe me! Then I apply my mascara. I use waterproof, since other types of mascara always seem to uncurl my lashes (so annoying). My all time favorite and the one I always go back to is the Voluminous Million Lashes mascara by L'Oreal (my favorite drugstore brand) in black noir. I use a separate mascara for my bottom lashes as I have trouble with smudging. For some reason the cheap CoverGirl waterproof mascaras never smudge when applied to my lower lashes. I'm using the Exact Eyelights mascara in black gold
The last step is adding a bit of blusher, although I decided here to add only bronzer. This one is from a Laura Mercier palette (another gift, which I just adore). But use whatever blush you like. I also really love the Tarte blush in the Aqualillies for Tarte palette (similar Tarte palette) from last year (another gift!).

That's it! I hope this was helpful! I know, this is rather lengthy! Maybe someday I'll do some beauty video tutorials instead. I'm sure it would be loads easier than trying to take pictures!! Let me know if you have any questions. Thanks for reading! 

xx
Anna

P.S. I didn't use anything on my lips other than plain old Vaseline. :)

how i care for my hair.

1.23.2013

how i care for my hair how i care for my hair
Affiliate links included in this post.

I thought I would share my hair care routine with you all, since one of my readers asked what I do to my hair to keep it healthy (thanks Yael for asking, by the way!). I used to have a lot of trouble with my hair and I hated how thick and frizzy it was. I tend to have thick, somewhat course hair. But it is much better today than it used to be. I have a few tips for my type of hair that I've found works fairly well. First of all, don't use cheap shampoo that strips your hair of its natural oils. Find a shampoo that has argan oil or another type of moisture/oil in it. It doesn't have to be expensive either. I really like the Shea Moisture brand that you can find at most drugstores. It's inexpensive and it lasts a really long time. Both Jed and I use it and he has really curly hair that can get frizzy if he uses the wrong shampoo. I also apply a small amount of argan oil all throughout my hair while it's still wet. Sometimes I will even apply a tiny amount at the top of my head, where I can have a tendency to get frizzies. I generally put more oil in my hair during the humid summer months than the winter. If it's really cold and dry, my hair is straight. When it's hot and humid, my hair is a wavy puff ball. However, ever since I started using argan oil, I haven't had much trouble with frizz! I also use conditioner, but I don't worry about getting an expensive one. I've been using the Dove brand for awhile now, which is nice and thick and it keeps the tangles at bay.

Up until more recently, I really haven't used a hairdryer or curling iron/straightener on a regular bases. I think that is partly why my hair isn't damaged. I also know now that since I'm drying my hair more often and using really hot curling irons etc., I should probably get a heat protectant. Anyone know of one that is good? I hate adding extra gunk to my hair if I don't have to, but I don't want to damage it either. Other than that, my hair routine is pretty simple. I also take a good multi vitamin and other supplements for my skin (zinc for blemishes). I haven't taken any of those hair/skin/nail vitamins before, though. I wonder if anyone has had experience taking these sorts of vitamins? Do they make your hair grow faster or skin softer? That is another thing I need to research more about; dry skin. I inherited dry skin, which is quite annoying! I'm sure there is something lacking in my diet, but for now I just have to make sure I use a really thick lotion and body oil right after a shower, otherwise my skin hates me. But now I'm getting off topic!

The hairbrush I use is by Sonia Kashuk for Target, which is similar to the very chic and very expensive Mason Pearson brush. I love that the Sonia Kashuk brush is not expensive so if something were to happen to it, it wouldn't be the end of the world. Mine is amazing on those nasty nape-of-the-neck tangles I tend to get. And best of all, tangles are never painful to brush out. I also use a brush to tease my hair when I'm feeling in a '60s mood! The one I use is called "Teaze" by Phillips. I got it on Amazon for $5 or $6 and it works really well. Like I mentioned before, I love the Elnett hairspray by L'Oreal. I've never liked a hairspray so much!

As for my bangs, I blow dry them while brushing to the left and to the right. Then I use my straightener to curl them under. When my bangs were shorter, I didn't always use a curling iron. Sometimes I would even put the smallest amount of argan oil to tame them (in the summertime), but I know when I do that I'll probably need to wash them the next day. At the moment I am currently growing them out, so I'm playing around with different ways to wear them. I still love my bangs, but I think I'm ready to try another style. I used to trim my bangs, which is so simple to do yourself and saves on trips to your hairdresser every other week.

So, what are some tips you've learned about your hair? Any fabulous hair products that you would like to tell me about?

spring cleaning!

4.06.2012

new lipstick.

new lipstick.

new lipstick.

Hello everyone! It has been awhile since my last post during spring break. I've been home for awhile now and have been spending my time cleaning and de-junking this place. I feel like I haven't really devoted a good amount of time on this for a couple years. I've been through two moves in just over a year and every time I moved it felt kind of rushed. Also, since I am now only making my own line of clothing and have stopped sewing historical clothing, I want to get rid of extra fabric that has been sitting around for years. I can always buy fabric if I need it, but I hate having boxes and boxes of fabric that I'll never use. So now I have a pile of boxes in the living room that need to GO. I haven't figured out quite yet how I'm going to get rid of them. Might do a little yardsale online, but we'll see. Today I'm going to clean out the closet in my bedroom and probably make a pile of clothes to get rid of as well. Maybe I will have one big yardsale. ha! Maybe it's finally time I buy myself a little cart so it's not a pain every time I hike over to the post office. Anyway, it feels so good to finally get rid of things I never use or papers that I printed long ago and have forgotten about. Having a clean place means I am more productive and a lot more happy. So I'm being ruthless with my stuff and getting rid of as much as I can.

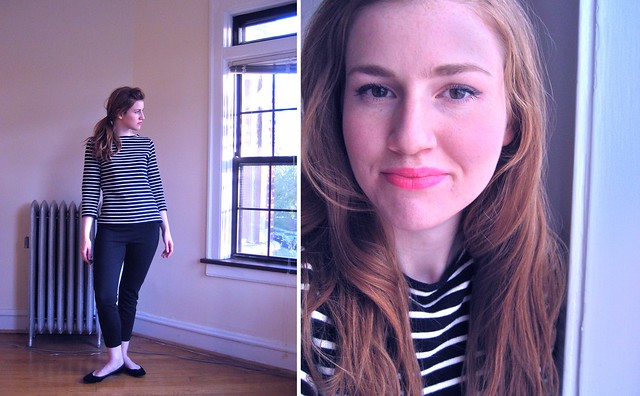
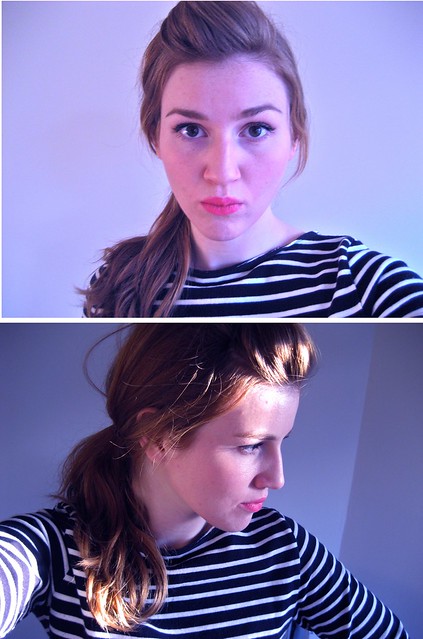
In other news, I bought myself a new brightly colored lipstick yesterday and I must say, I think I've found my favorite lipstick! It's called "Love That Pink" in the Moon Drops line, by Revlon. It's the classic line that has been around for years and I know why! It goes on perfect and stays in place, which is a must for me, since I really haven't had a lot of experience wearing lipstick in my 27 years. :) But I want more experience with it, since I just love how it looks! It's so classic and makes me feel so pretty. That saying really is true; if you're feeling a little down, just go pick up a new lipstick and "voila!" all is well again! I think my next lipstick purchase will be from this same line. They have some really fun colors like "Persion Melon" (I've heard this is the official Pan Am girls lipstick color) and "Orange Flip". Yum!

In other news, I have been really itching to sew some clothes for myself lately. It's been far too long since I've sewn clothing for my own wardrobe. So I'm thinking a lot about that. Maybe I'll do more outfit posts on here. I need to find a better place to take pictures, though. The radiator just is not very pretty. So hopefully I'll be posting more of my own sewing adventures and not just my shop sewing!

Speaking of the shop, I have the spring line all ready, but I wanted to take a little break to clean the house, which is why I'm keeping it to myself for a bit. Also my brother John is helping me clean up my website and make it look sleek and pretty. But I think you will like what I have for spring and summer. I even have a little special something to share that my brother John put together. Can't wait to show you! More on that soon!

Have a lovely Friday and weekend! xoxo

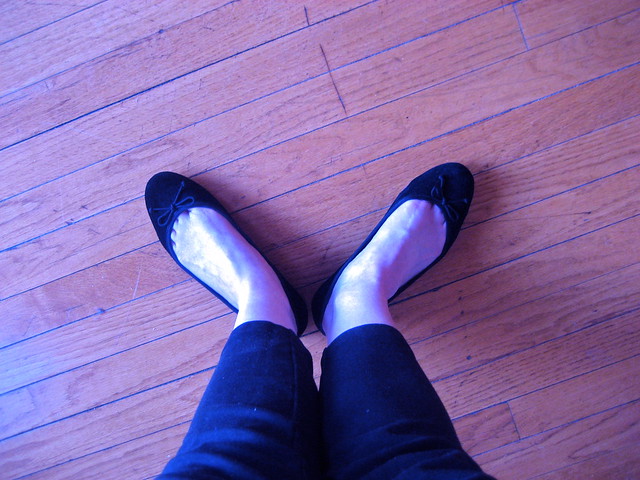
{What I'm wearing: Lands' End Boatneck Sailor Tee, J Crew Pixie Pants, Lands' End Canvas "The Heritage" Ballet Flats, Revlon Moon Drops Lipstick in "Love That Pink" #575.}